DESIGN PROCESS
PHASE 1 - DISCOVERY
Inquiry
Scope
Budget Proposal
Contract
Minimum Engagement Fee
PHASE 2 - CONCEPT DEVELOPMENT
Look and Feel Presentation
Field Measurements
Sourcing
PHASE 3 - DESIGN DEVELOPMENT
Design Presentation
Floor plans and elevations
PHASE 4 - IMPLEMENTATION
Invoice
Ordering
Subcontractor Management
Installation Schedule Establishment
Orders Received
PHASE 5 - INSTALLATION
Furniture, art and accessories Installation
Deficiencies Walk Through
Resolution of Deficiencies

Design process phase 2 : DESIGN CONCEPT
LOOK & FEEL PRESENTATION
Look and Feel Boards are developed through continued client & designer conversations. Presented during the Look & Feel Presentation, the boards showcase the overall aesthetic direction of the project.
The images shown are conceptual for inspiration and not the actual items that we specify for your home. These represent a deep dive into the clients’ goals, vision and design style and serve as a guidepost for all decisions to come.

Design process phase 3: DESIGN development
PRESENTATION
Our final design presentation reflects the full scope of a project. Showcased are a set of unique documents that act as cornerstones through the life of the project. Furniture Boards exhibit all proposed furnishings and soft elements for a project. Individual spaces are showcased in full with their corresponding fabrics, trims, finishes or any other details that need to be called out.

FINISH BOARDS
Finish Boards represent the actual items proposed for each space. Considerations are made on the all the elements that impact construction, from tile and flooring to plumbing and lighting.

FLOOR PLANS
If original floor plans are available, we ask for an electronic version to develop our own set to work from. If a full set of plans is not available, we will set up a day to come and measure your home and the spaces included in your scope. We create scaled furniture plans that showcase the proposed furniture, lighting, rugs, etc. We include as many aspects as we can so the client can fully realize the space.

ELEVATIONS
Scaled room elevations are developed when necessary. This is an incredibly useful tool when denoting custom tile designs in primary bathrooms or cabinet layouts in kitchens. All proposed furniture, fixtures, hardware, or unique details will be rendered and scaled. These drawing can also be used in the permitting process.

3D RENDERING
Interior renderings are developed as a graphic tool that provides the client with an accurate preview of what a project or room will look like before its completed in the real world. The renderings showcase all materials, finishes, and furniture pieces proposed for a project or room.

Design process phase 4: implementation
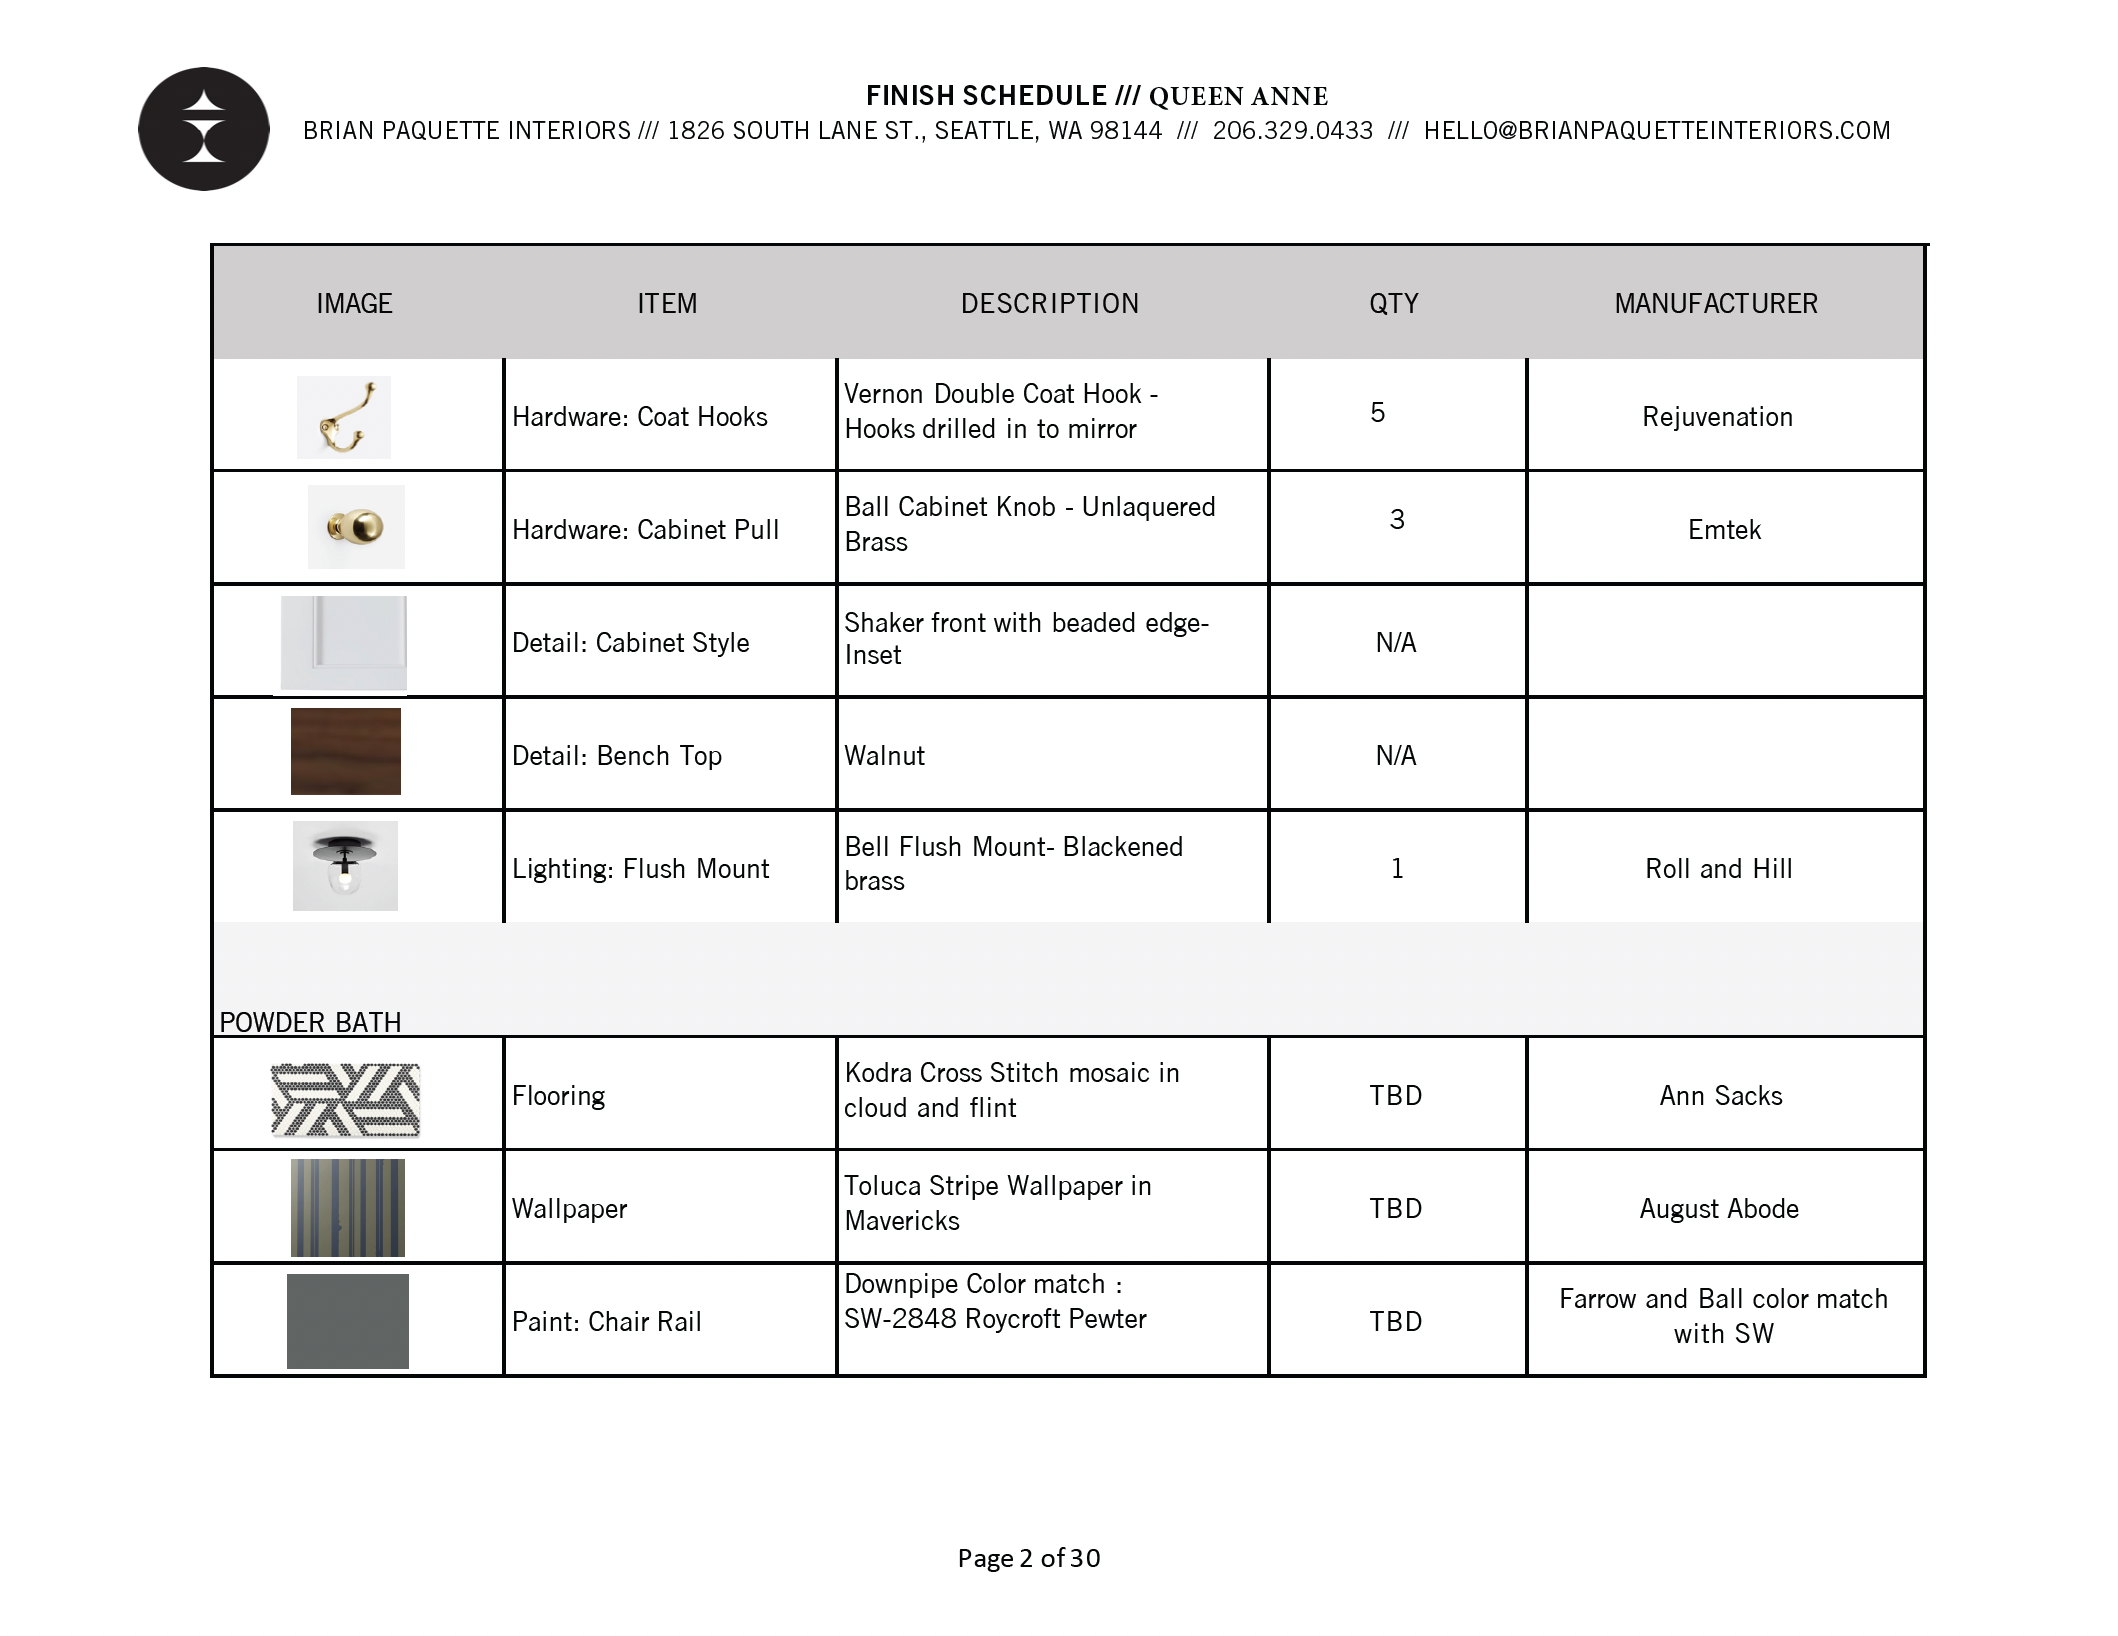
FINISH SCHEDULE
A Finish Schedule is developed as a visual reference guide organized by room. It includes all the approved finishes & fixtures. It’s a real time document that’s updated through the life of a project and shared with all parties involved.
PROCUREMENT DOCUMENT
Once the furniture invoice is paid, we immediately start ordering for your project. A Procurement Spreadsheet is developed to capture an umbrella view of purchases made and their relative expected time of arrival to our receiver. A general project timeline is established, and a copy of the Procurement Spreadsheet is emailed to the client weekly.

EXPENSE REPORT
Updated through the life of your project and emailed weekly, your expense report reflects all paid invoices to date. The spreadsheet breaks your expenses into the three “buckets” that create your budget proposal: furnishings, billed hours, and shipping/storage.
